A step-by-step tutorial on how to make horrible cat art with Neural Style Transfer and Tensorflow 2.1.
With only a few hours left on December 23rd, I decided to create a last-minute Christmas gift. I selected some pictures of my cat, used a pre-trained Neural Style Transfer model to create an artistic version of them, and merged the transformed pictures into a single image.
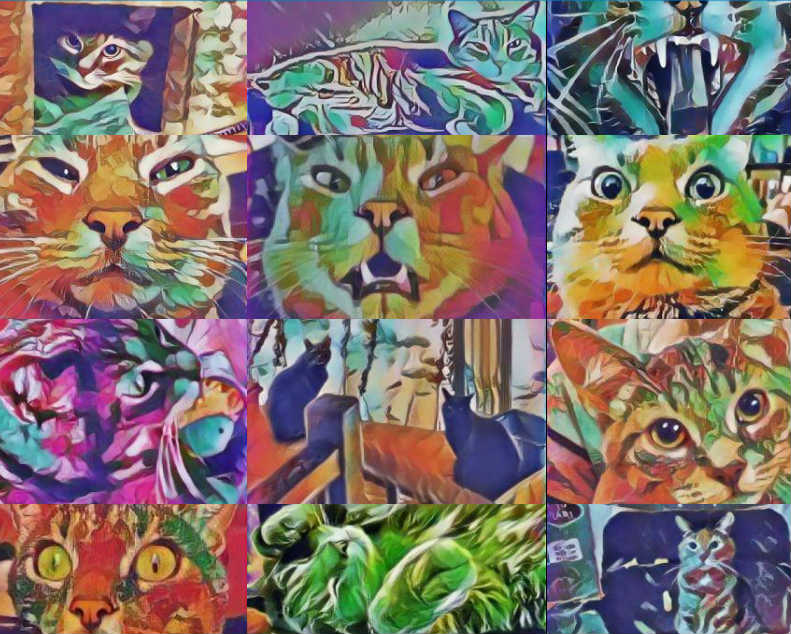
The resulting piece of art is so vivid and colorful that it would make anyone throw up if they dared look at it for too long. And I came to this realization only after I spent 40$ on printing that thing on a canvas. Now this atrocity stares at me every time I sit in the kitchen, an endless reminder of my failed attempt at becoming an artist.
If you want to fail at cat art too, here is a step-by-step guide on how to do it with Tensorflow 2.1. The code is also available directly on github.
Neural Style Transfer
A Neural Style Transfer model takes two images as input and generates a new image. The generated image combines the content of the first image with the style of the second one.
The original approach was proposed in 2015 and was based on the idea that the representations of content and style in a Convolutional Neural Network (CNN) are separable. The model can minimize a content loss that depends on the first image and a style loss that depends on the second one. By optimizing both objectives simultaneously, a random image can iteratively be updated to combine the content and style of two distinct images.
If we have a CNN that was trained for a computer vision task, deeper layers of this model will detect more complex information (e.g. faces rather than lines). When two images with similar content are processed in a deep-enough layer of that CNN, we can expect their activations to be similar as well. Following this idea, the content loss can be defined as an L2 norm between the activations of two images in a single deep layer of the CNN.
For the style loss, the aim is to detect which texture components tend to occur together in an image. By computing a matrix of similarity over the channels of a specific CNN layer, we can obtain a "correlation" score that represents how much textures occur together or not. A style loss for a single layer can be computed by using the distance between the similarity matrix of the generated image and the one of the style image. This process is repeated for each layer of the CNN and the sum of these comparisons is used to obtain the complete style loss.
Neural Style Transfer has evolved over the years and other variants have been proposed. These newer methods can learn to generate the image directly instead, resulting in improved computational performances. To learn more about Neural Style Transfer, you can check out this Tensorflow tutorial.
Step 1: Select Your Datasets
We need two types of datasets to use the Neural Style Transfer model.
Content
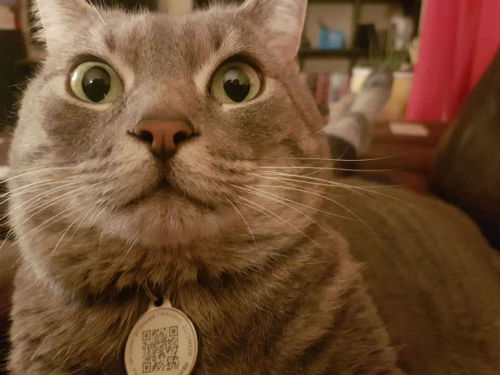
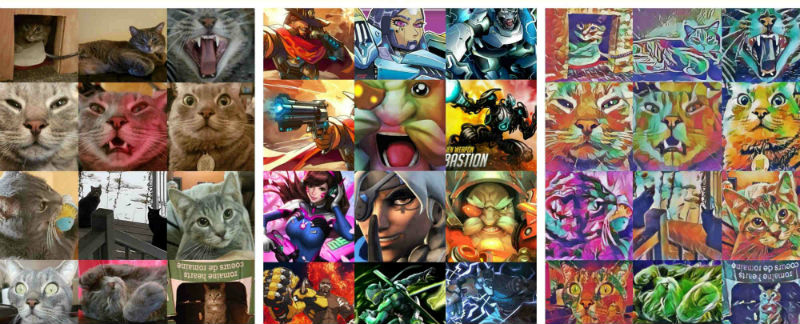
The first one is the content dataset that will contain our cat pictures. For this one I went through the 50,000 pictures I have of my cat and selected the best ones.
Style
The second dataset type is the style dataset. In this case, we're looking for pictures with interesting shapes and colors that will be used to transform the style of our original cat pictures. I ended up browsing Kaggle datasets until I found these two datasets:
- Art Images: 9000 images of 5 types of art including drawings and paintings.
- Overwatch Heroes: 2,291 images of Overwatch heroes.
Step 2: Install Dependencies
The project has 3 main dependencies.
Pipfile
[packages]
pillow = "*"
tensorflow-gpu = "~=2.1"
tensorflow-hub = "*"
You can install either tensorflow-gpu or tensorflow. We will use tensorflow-hub to load the pre-trained model and pillow to process the images.
You can install these dependencies from the Pipfile.lock here.
Step 3: Load and Resize Images
We'll use the file image_processing.py to pre-process the images. The function below first loads an image from a file and transforms it into a float tensor with 3 color channels. Then, the tensor is resized to have at least one dimension (height/width) equal to 512 while preserving the aspect ratio. Finally, we add an additional axis to represent the batch size. In our case, we'll process one image at the time so the first axis will always be of size one.
image_processing.py
import tensorflow as tf


def load_image_tensor(image_path: str, max_dim: int = 512) -> tf.Tensor:
    image_tensor = tf.io.read_file(image_path)
    image_tensor = tf.image.decode_image(
        image_tensor, channels=3, dtype=tf.float32
    )
    image_tensor = tf.image.resize(
        image_tensor, (max_dim, max_dim), preserve_aspect_ratio=True
    )
    image_tensor = image_tensor[tf.newaxis, :]
    return image_tensor
For example, if we load an image of size 1393 x 1943, then image_tensor will have the shapes:
- (1393 x 1943 x 3) after decoding,
- (367 x 512 x 3) after resizing,
- (1 x 367 x 512 x 3) after adding a new axis.
Step 4: Create an Image Tensor Generator
In loader.py, we'll create a generator that calls the load_image_tensor function of the previous step. The function loops through the files of a specified image directory. Each image is converted to a tensor and is then returned to the caller.
loader.py
from glob import glob
from os.path import join
from typing import Iterator

import tensorflow as tf

from fifty_shades.image_processing import load_image_tensor


def generate_image_tensors(directory_path: str) -> Iterator[tf.Tensor]:
    file_path_regex = join(directory_path, "*")
    for file_path in sorted(glob(file_path_regex)):
        image_tensor = load_image_tensor(file_path)
        yield image_tensor
Step 5: Transform and Save Images
In model.py we'll create an adapter class for our pre-trained model to transform and save our images. The constructor of that class downloads a pre-trained model from Tensorflow Hub. You can modify the version of the model depending on which Neural Style Transfer approach you want to use. In my case I used the original approach (version 1).
model.py
from os.path import join
from typing import Union, Iterator

import tensorflow as tf
import tensorflow_hub as hub
from PIL import Image
from keras_preprocessing.image import array_to_img

from fifty_shades.image_processing import save_image_from_tensor


class NeuralStyleTransfer:
    def __init__(self):
        self.model = hub.load(
            "https://tfhub.dev/google/magenta/arbitrary-image-stylization-v1-256/1"
        )

    def predict(
        self, content_tensor: tf.Tensor, style_tensor: tf.Tensor
    ) -> Image:
        predicted_tensor = self.model(content_tensor, style_tensor)
        predicted_image = array_to_img(predicted_tensor[0][0])
        return predicted_image

    def predict_and_save(
        self,
        image_id: Union[str, int],
        content_tensor: tf.Tensor,
        style_tensor: tf.Tensor,
        save_directory_path: str,
    ) -> Image:
        predicted_image = self.predict(content_tensor, style_tensor)
        predicted_image.save(join(save_directory_path, f"{image_id}.png"))
        save_image_from_tensor(
            save_directory_path, f"{image_id}-content.png", content_tensor
        )
        save_image_from_tensor(
            save_directory_path, f"{image_id}-style.png", style_tensor
        )
        return predicted_image

    def predict_and_save_all(
        self,
        content_tensors: Iterator[tf.Tensor],
        style_tensors: Iterator[tf.Tensor],
        save_directory_path: str,
    ) -> None:
        for i, (content_tensor, style_tensor) in enumerate(
            zip(content_tensors, style_tensors)
        ):
            self.predict_and_save(
                i, content_tensor, style_tensor, save_directory_path,
            )
The predict method calls the model with the content and style images. The resulting tensor is transformed into an image with the array_to_img function of keras. The predict_and_save method saves the content, style, and transformed images after the prediction. In predict_and_save_all, we repeat this process for multiple content and style images.
I was only testing on a small image sample so I processed the images one at the time. But if you are testing on a larger set, it would be faster to make predictions for multiple images at once instead. To save our content and style images more easily, I also added the following helper function.
image_processing.py
from os.path import join

import tensorflow as tf
from keras_preprocessing.image import array_to_img


def save_image_from_tensor(
    save_directory: str, file_name: str, tensor_image: tf.Tensor
) -> None:
    save_path = join(save_directory, file_name)
    image = array_to_img(tensor_image[0])
    image.save(save_path)
Step 6: Run the Model
We now have all the pieces in place to run our model. In the file example.py, we first create a cat and a style generators that will be used to iterate over our image tensors. Then, the model is called to transform the images and save the result.
example.py
from fifty_shades.loader import generate_image_tensors


save_directory = "my/save/directory"
cat_generator = generate_image_tensors("cat/images/directory")
style_generator = generate_image_tensors("style/images/directory")
model = NeuralStyleTransfer()
model.predict_and_save_all(cat_generator, style_generator, save_directory)
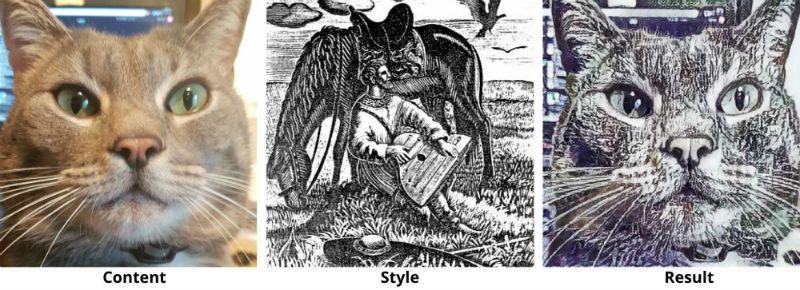
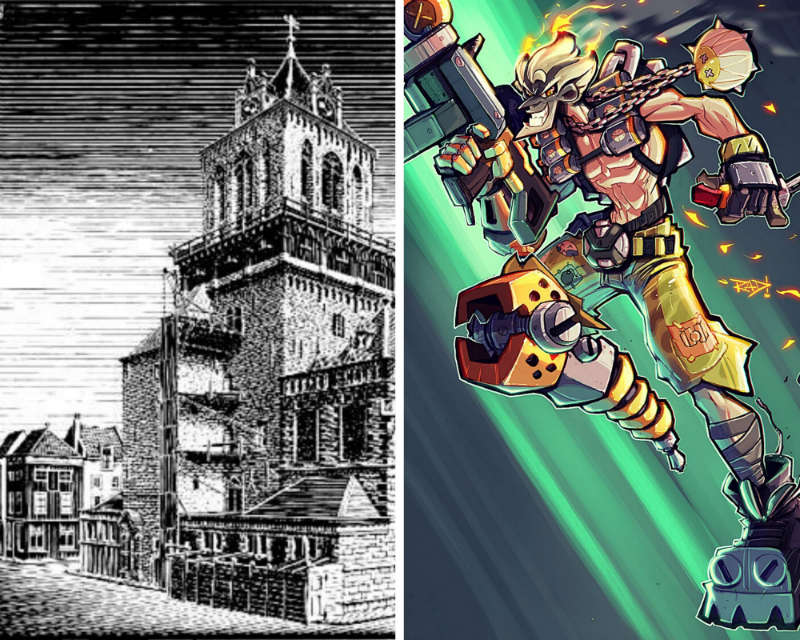
Here is the result on a couple of sample images.

Step 7: Make a Canvas
If you want to print these images on a canvas like mine (hopefully yours will look better), find a photo store near you. They usually have an online tool where you can manually select the images you want to use and combine them.
Your Turn
Now try it for yourself on your own data. Go outside, steal a cat, take pictures, transform them, and build a canvas. It's your turn to ruin someone's kitchen with your art.

If you want to learn more on Neural Style Transfer, here is a list of helpful resources:
- Deeplearning.ai videos that explain the original Neural Style Transfer approach.
- A Tensorflow tutorial on Neural Style Transfer.
- The original paper: A Neural Algorithm of Artistic Style.